In the vast digital landscape, where information is at our fingertips, and attention to detail is shrinking, eye-catchy visual representation is a must-do thing. Whether you’re a blogger or a content creator, you know that aesthetic design with a clean user experience plays a pivotal role in keeping your website audience engaged. A blog post grid can make your website visually alluring with its classic layout because the old traditional layouts might look boring to the audience. So, why not try something modern?
When we talk about blog post presentations, this is where the blog post grid plugin comes into play. So, as a WordPress enthusiast, you can effortlessly elevate the functionality and appearance of your WordPress website. If that’s the case, we have some good news for you. You’re in for a treat! This article will teach you how to create a blog post grid using the magnificent Smart Post Show plugin. It’s time to embrace the most dynamic way to showcase your blog post.
Let’s get started.
How To Add Blog Post Grid in WordPress?
Before starting the tutorial, download and install the Smart Post Show plugin from the link below.
Step 1
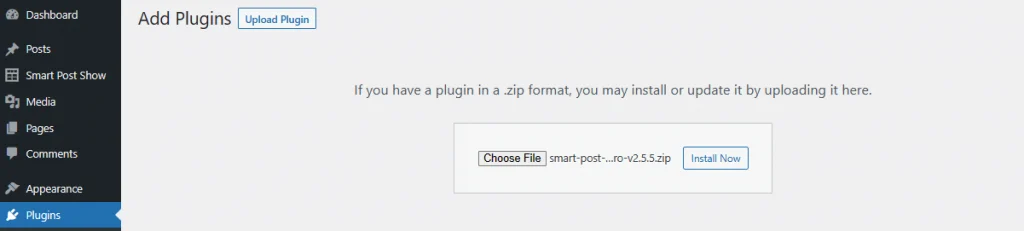
Go to the Add New option from Plugin on the left sidebar menu. Choose Upload Plugin and Choose File. Select the Plugin file from your device, then Install and Activate the Smart Post Show.
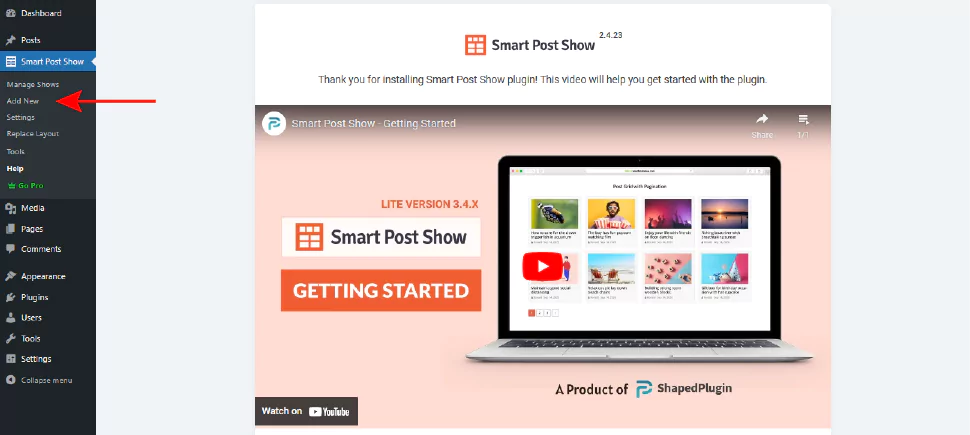
After successfully installing and activating the plugin, the starting panel will appear on your WordPress dashboard. Select the Add New menu to start from scratch.
Step 2
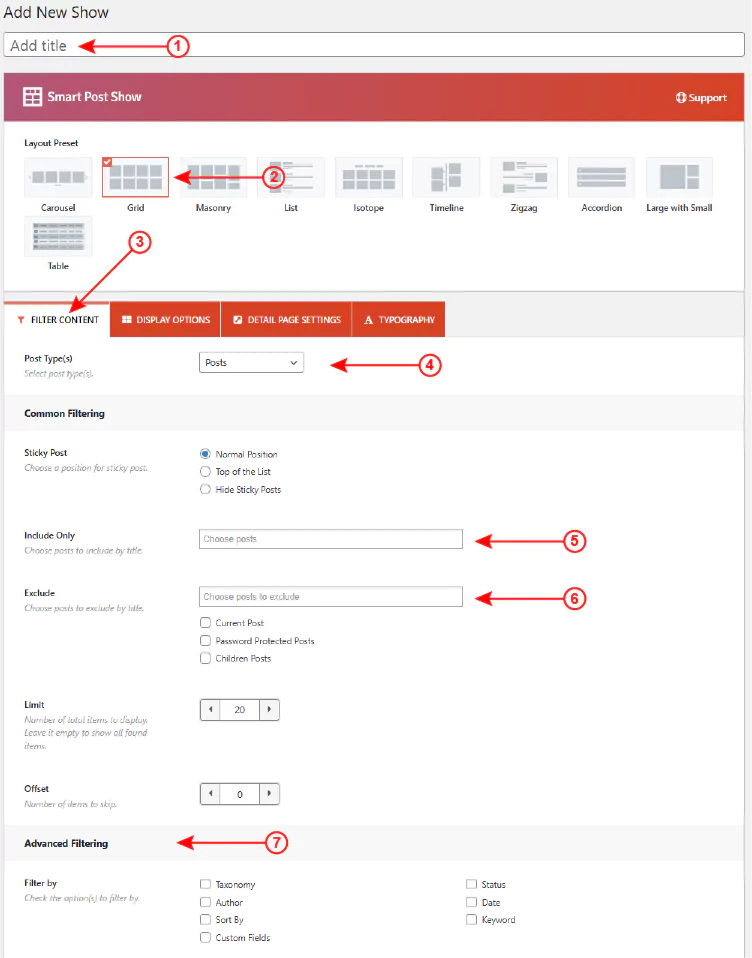
Now follow these directions accordingly.
- Add the title from Add Title box.
- Select Grid from the Layout Panel.
- Now go to the Filter Content tab to start over.
- A window will appear. Go to the Post Types drop-down menu and select Posts. You can also decide sticky post position.
- You can go to the Include Only box and add selected blog posts you want.
- Now you can Exclude any blog post you want. Add the blog title or select the desired option.
- You can choose the filtering option from the Advance Filtering portion.
Your blog post grid creation is primarily over. You can now publish the post if you want. Just click on the Publish button, and you’re done. Now you can enjoy the stylish and elegant blog post grid. However, if you want to modify the grid layout, you can follow the following steps ahead.
Step 3
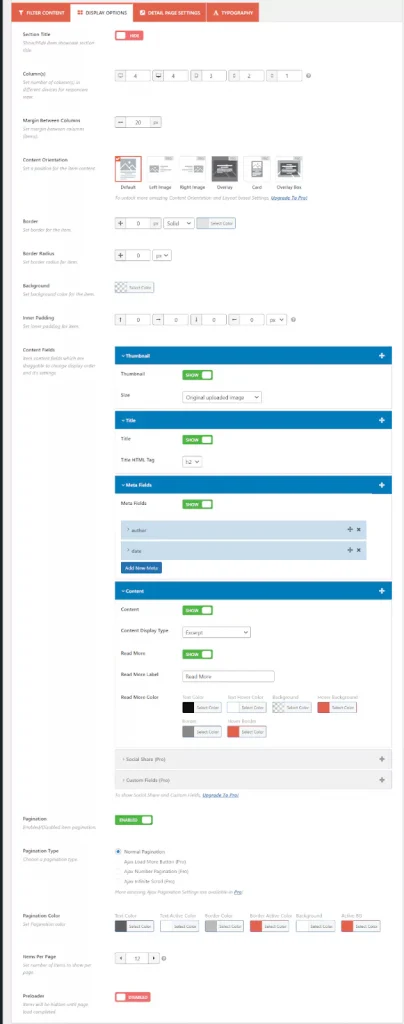
You’re already done with the post-grid creation. Now go to the Display Options tab for further procedures. You can thoroughly hide/unhide section titles and choose the number of columns, margin size, content orientation, border size, content fields, and more.
Step 4

You can play around with the Detail Page Link Type, Target for the item link, and Nofollow link in the Detail Page Settings tab.
Step 5
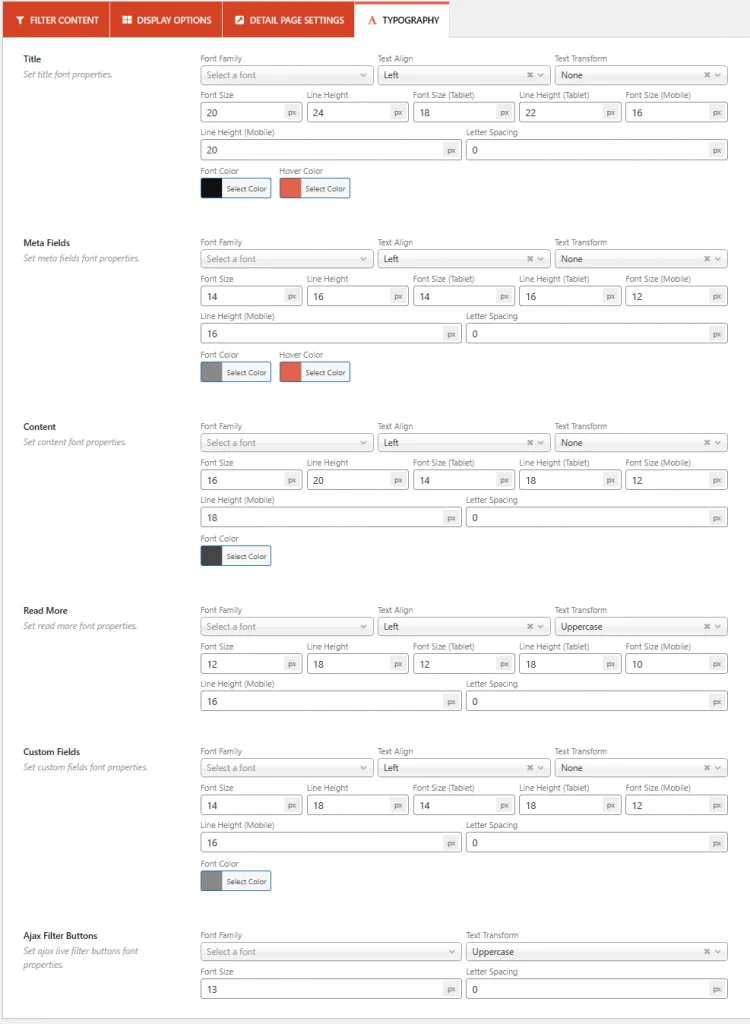
In the Typography tab, you can set the title, meta field, content font, font color, hover color, custom field, and more.
These are the step-by-step guide to creating and customizing a blog post grid on your WordPress website.
Super easy, isn’t it?
Wrapping Up
So, this is the end of the journey. It’s now clear that having a blog post grid on a WordPress website can be a game-changer. It helps to improve your website’s aesthetics and user experience. It also gives you the endless power to display your web content effortlessly. Isn’t it the best way to captivate your audience?
Remember that your website’s beauty lies in its variety of content and perfect presentation. Whether it’s about posts, images, videos, or portfolios, a blog post grid plugin allows you to display various content ranges. So, if you’re a blogger or a newbie content creator looking for the best post grid plugin, Smart Post Show can be your one-stop solution.
Finally, we hope the article was resourceful to you. Let’s not waste any more seconds and dive deep into the world of visually enthralling content presentation with a perfect blog post grid layout. If you find this article helpful, don’t forget to share your valuable thoughts with us.
Leave a Reply