In this blog, I’ll show you how to add a button in WordPress in two methods: Basic and advanced. However, no methods require a single line of codes.
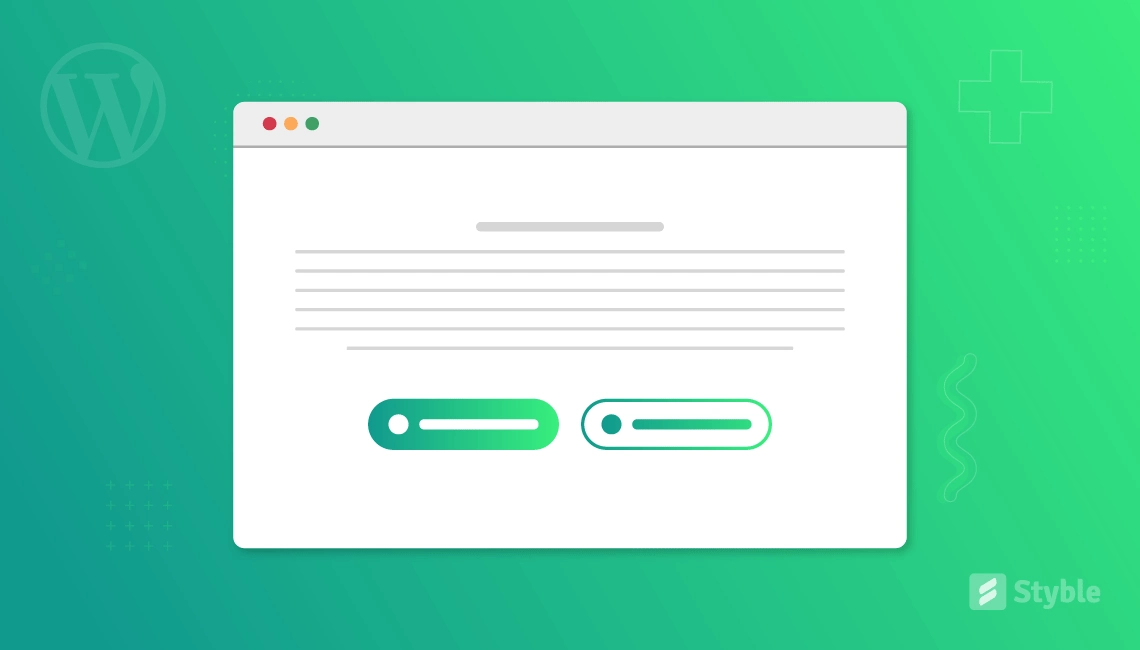
Buttons are crucial. They are the ultimate elements of web design. Your aesthetic graphics, persuading copies, videos, and all are to impress the visitors and push them to the buttons to click.
Therefore, buttons should be attention-grabbing, highly readable, modern, and set in the perfect place for the highest conversion.
So, continue reading to craft highly converting buttons in minutes without code and grow your business.
How to add a button in WordPress (Basic)
This primary method is simple. It allows you to add basic buttons in the WordPress default editor Gutenberg. Here, I’m using the theme: Twenty Twenty-Three.
Step 1: Find the button block
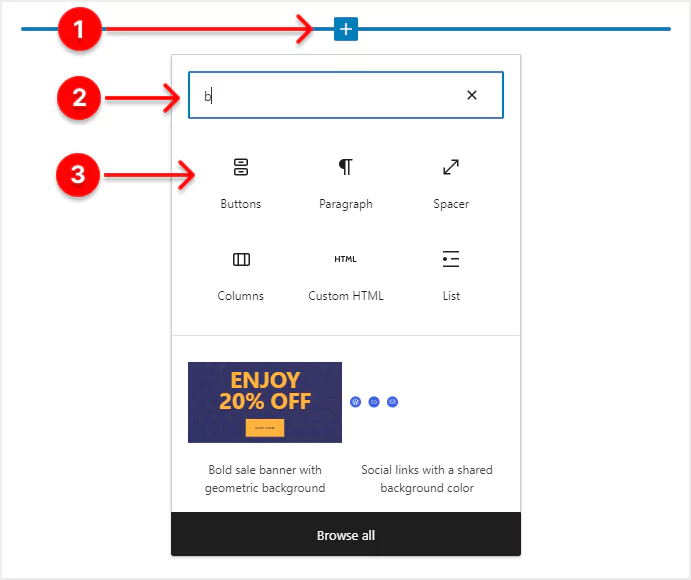
First, go to the place of your website post or page where you want to add a button. Then follow the simple steps.
- Click the plus +
- Type the button in the search box.
- Click the button block.
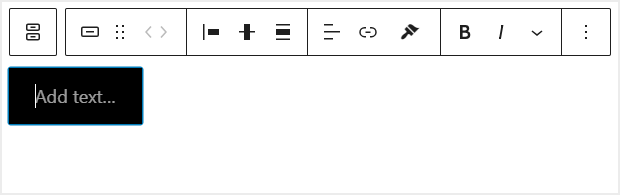
Step 2: Add your button text
Click on the button and type your button label. The title case is better for higher readability.
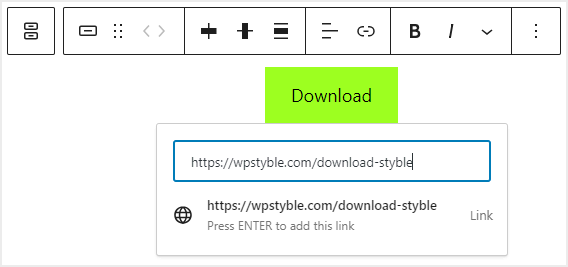
Step 3: Link your button
In the text field, paste the URL to which you want the button to link and click the Link.
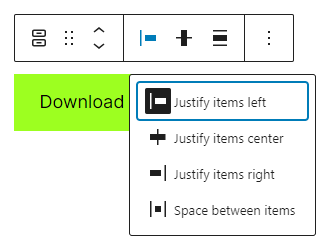
Step 4: Align your button
Click on the justification icon and find four options to align your button.
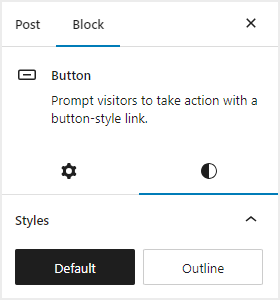
Step 5: Customize your button
Click the half-filled circle on the right sidebar and find customization options:
Color
You can add custom colors to your button text and background. Plus, you can add linear and radial gradients of colors to your button background with custom angles.

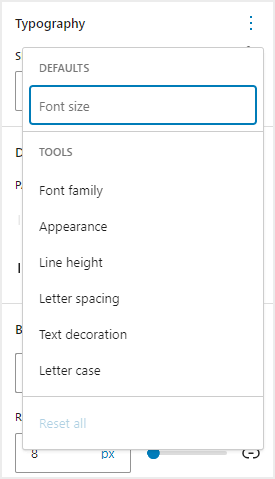
Typography
It offers you six font families, ten different weights for normal and six different weights for italic font style, custom line height, custom letter spacing, underline, and letter cases. Click the three dots of Typography and find the options.
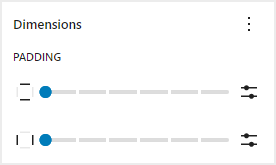
Dimensions
It lets you set custom horizontal and vertical padding for your button.
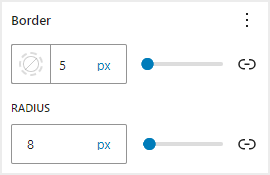
Border
You can add solid, dashed, and dotted borders of custom color to your button. Plus, you can set a custom radius to your button border.
However, this basic method doesn’t allow you to add icons, custom hover, advanced typography, border shadow, etc.
How to add a button in WordPress (Advanced)
The advanced method is simpler. It allows you to craft buttons without limitations.
Step 1: Install and activate Styble
Styble is the latest Gutenberg blocks plugin. It comes with advanced and easy-to-use blocks, including a button block. It offers you the best web-building experience.
So, let’s install it.
First, click Styble to download it. After that, open your WordPress dashboard in a new tab and follow the easy steps below.
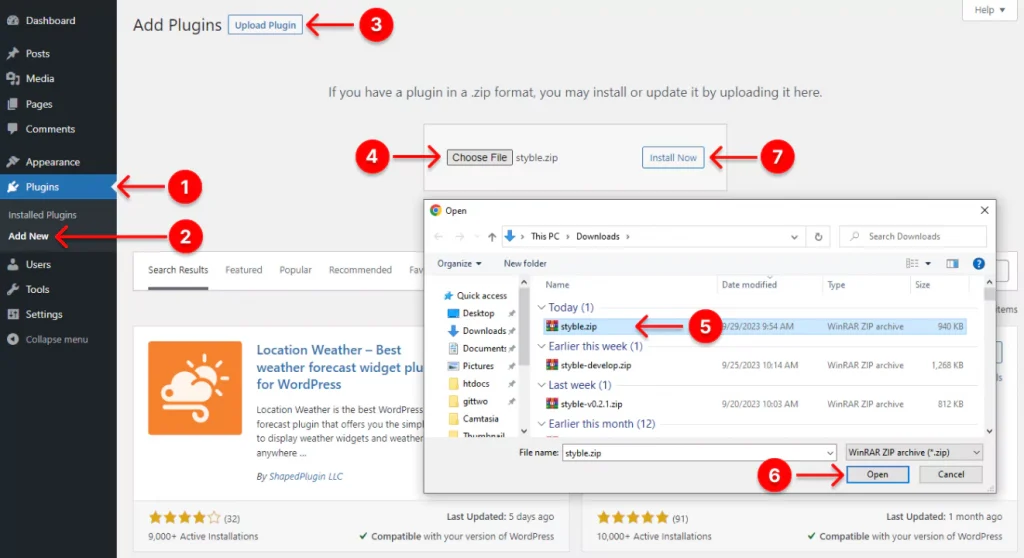
After downloading Styble, click 1. Plugins → 2. Add New → 3. Upload Plugin → 4. Choose File (it will take you to your Downloads) → 5. Select the “styble.zip” file (If you don’t find it, please click here and then click Downloads again). → 6. Open → 7. Install Now.
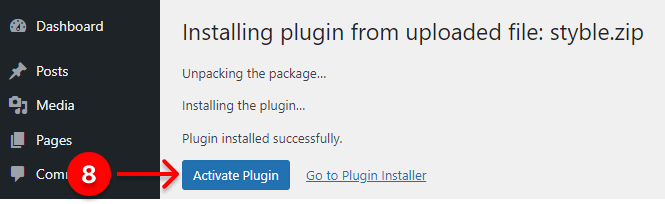
8. Finally, click Activate Plugin to have the Styble on your WordPress dashboard admin sidebar.
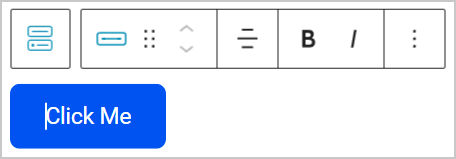
Step 2: Find Styble’s Button block
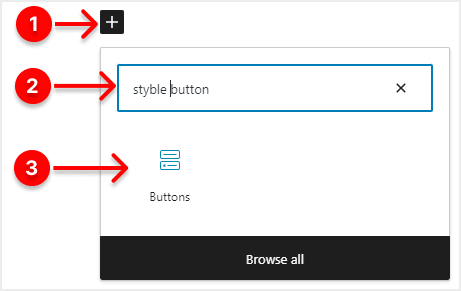
First, go to the place of your website post or page where you want to add an advanced button and click there.
- Click the plus +
- Copy the styble button and paste it into the search box.
- Click Buttons block.
Step 3: Add your button text
Click on the button and add your button text. Web designers prefer the title case for its higher readability.
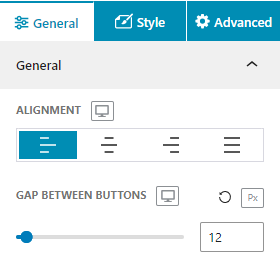
Step 4: Align your button
Choose an option among the four to align your button.
Plus, if you have multiple buttons, you can customize the gap between buttons for large, medium, and small devices individually.
Step 5: Link your button
First, click a single button. Next, go to copy the link address (URL) you want the button to link to and paste it into the link field.
Plus, you can simply set the link to open in a new tab.
Moreover, it lets you add the “nofolow” attribute in the context of hyperlinks (HTML anchor tags) to instruct search engines not to follow the link or pass any authority or “link juice” to the linked page.
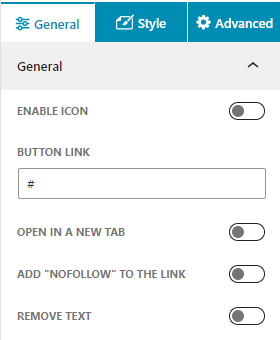
Step 6: Add icons to your buttons
Styble button block allows you to add icons to make your button more accessible.
Turn on the ENABLE ICON toggle and click the dropdown to choose an icon.
Plus, you can place it before or after your button text.
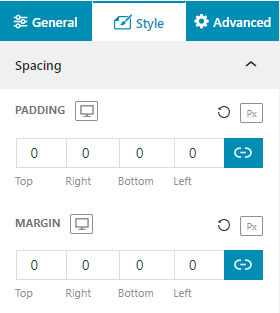
Step 7: Add padding and margin to the button section
First, click the buttons icon. Next, click Style and set padding and margin for your button section.
Step 8: Customize your button
First, click a single button. Next, click Style and find the customization options.
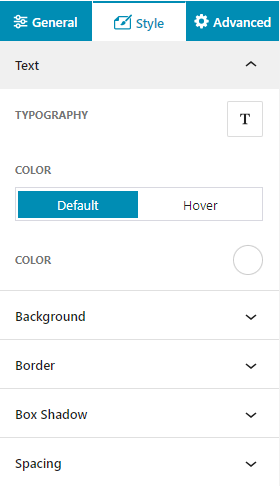
Text
Besides all the text features of the default editor, styble offers you a wide range of font families. Most importantly, it allows you to add a custom hover color to your button text. So, you can use your favorite font and make your button more consistent and interactive. Click the Text and the T icon to find all the advanced typography options.

Icon
You can set icon size and the gap between Text and icon for desktop, tab, mobile individually. Plus, you can add normal and hover custom colors to your button seamlessly.
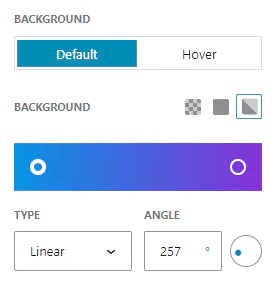
Background
You can add custom transparent, solid, and gradient colors to the default and hover button background for higher interactivity.
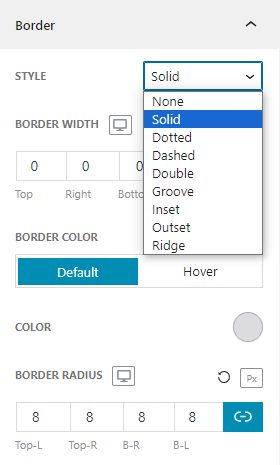
Border
Besides all the border features of the default editor, Styble offers you six border styles to make your button gorgeous.
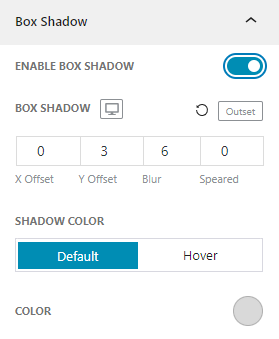
Box Shadow
Styble allows you to add custom box shadow and add custom color to the default and hover box shadow.
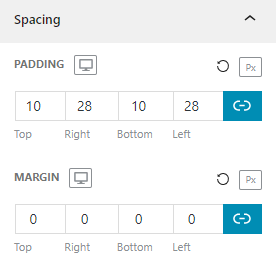
Spacing
You can set custom padding and margin to the sides individually. Moreover, it lets you add padding and margins for large, medium, and small screens separately.
Conclusion
I’ve discussed the key features of Styble that help you craft more advanced, accessible, interactive, and aesthetic buttons to grow your conversion rate.
However, as it’s continiously being updated, it may offer you more features today. So, explore Styble now.
Now, it’s your turn. Let us know what features you prefer for crafting a button. Let’s discuss buttons more in the comment box.
I hope this blog helped you learn something new about how to add a button in WordPress.
If so, please share it with your friends and followers on social media.
Leave a Reply